Pumpkin Patch

Create Your Own Pumpkin Patch
Fabrics:
A collection of orange scraps, background and stem fabrics.
Adjust your sewing machine stitch length to a shorter than normal stitch. The smaller stitches will help you remove the paper later.
Note: All of your fabric is placed on the un-printed side of your template. The only piece of fabric placed right side up is the very first piece.
All sewing is done on the printed side of the paper:
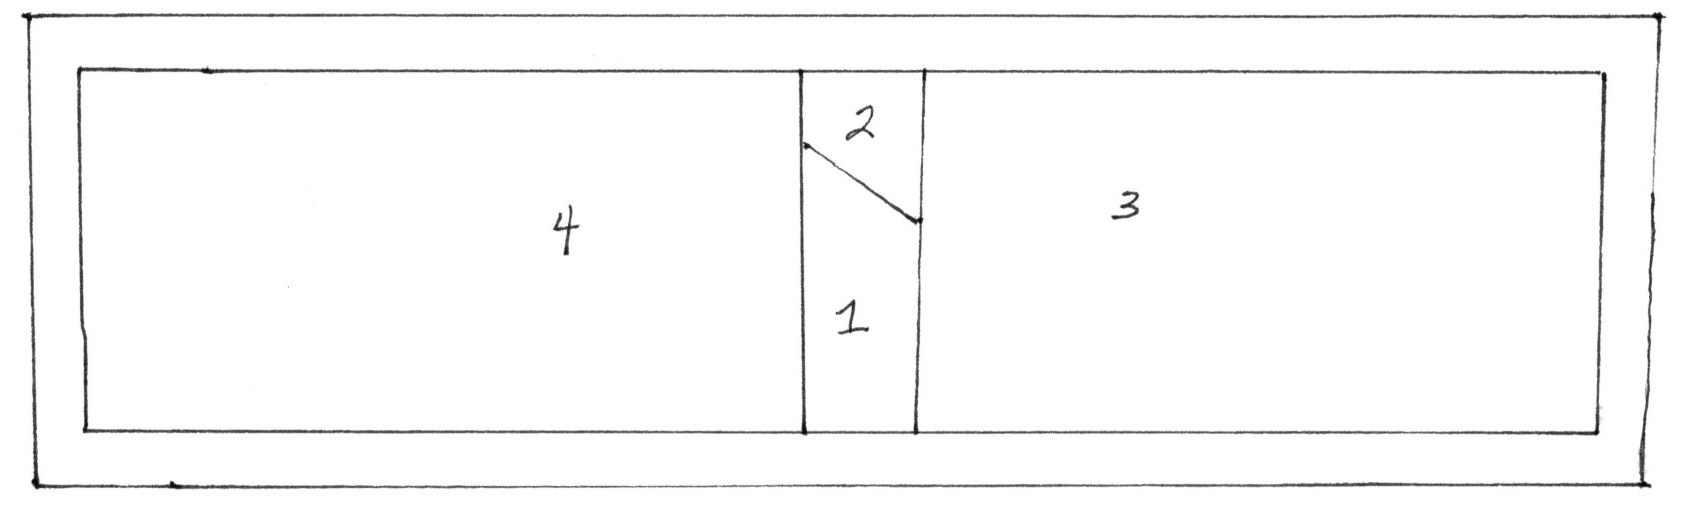
(Click on the image below for the PDF template)

On your template, the numbers represent the order to add your pieces, and the lines represent your seams.
- Cut a piece of fabric large enough to generously cover piece#1. You will need to have more than 1/4” extra fabric all around.
- Turn the paper to the Unprinted side and place the first fabric, right side facing up.
- Hold the paper up to the light to check that the fabric covers piece #1 with more than a 1/4” extra fabric all around. Pin or baste the first fabric in place.
- Cut a piece of fabric large enough to generously cover piece #2.
- Place the fabric for piece #2, right side down, on top of fabric piece #1. The two pieces will have right sides together. Pin or baste fabric in place.
- Turn the paper over to the pattern printed side.
- Stitch on the line between #1 and #2. Sew a few stitches (not more than ¼ inch) beyond the beginning and end of the seam.
- Turn the paper over to the Unprinted side and trim the seam you just sewed to 1/4”.
- Fold the #2 patch back, showing the right side of the fabric. Finger press seam open.
- Cut a piece of fabric large enough to cover patch #3.
- Continue the process as you did for the first steps 1-9 Continuing to follow the pattern sequence.
Note: use background fabrics on Pumpkin in corner pieces 4,6,9, and 11 - Rotary cut on the Outside 1/4” for the block.
- Complete pumpkin top using stem and background fabric using method 1-9
- Sew top and bottom of block together using ¼” seam allowance.
- Remove the paper backing after all the segments are assembled.